Understanding Neapolitan Pizza


Neapolitan pizza is a popular style and it’s easy to see why that is. With its signature charred bubbles (called leoparding) and soft yet airy crust, this pizza is baked in a scorching-hot oven at 840–900°F, ensuring a crisp bite and quick bake in just 60–90 seconds. But what makes this pizza so special, and how can you re-create it at home?


The Art and Science of Neapolitan Pizza Dough

Traditional Neapolitan pizza dough contains only four ingredients—flour, water, yeast, and salt. One of the defining characteristics of Neapolitan pizza is its hydration level. The amount of water in the dough is carefully controlled to ensure proper texture and baking performance. Too much water results in a longer bake time, which can lead to a burnt crust. Too little, and the dough won’t develop the airy, open crumb that gives the pizza its signature chew. In a high-heat oven, most of the dough’s lift comes from steam, so striking the right balance is essential.

The Role of Flour and Fermentation

Traditional Neapolitan pizzaioli swear by 00 flour, a finely milled flour that creates a soft, tender crust. However, modern approaches have expanded to include other types such as Tipo 0, Tipo 1, and Tipo 2 flours, which can bring additional depth of flavor and texture. Even the Associazione Verace Pizza Napoletana (AVPN), which sets the standards for true Neapolitan pizza, has started to allow variations beyond 00 flour, as well as the use of sourdough starters.

Fermentation is another critical factor. In Naples, room-temperature fermentation is the norm, with doughs proofing anywhere from 2 to 24 hours. Some pizzaioli also opt for a bulk fermentation step, lasting 5–10 hours, to enhance flavor and gluten development. Outside Naples, cold-proofing has become popular, as it extends fermentation time and adds complexity to the dough’s flavor profile.


Our Approach

While writing Modernist Pizza, we conducted extensive experiments to refine the Neapolitan dough process. While our ingredient proportions remain similar to those found in Naples, we opted for instant dry yeast instead of fresh yeast. This decision was based on reliability—instant yeast is more stable, easier to store, and just as effective in creating the perfect rise.

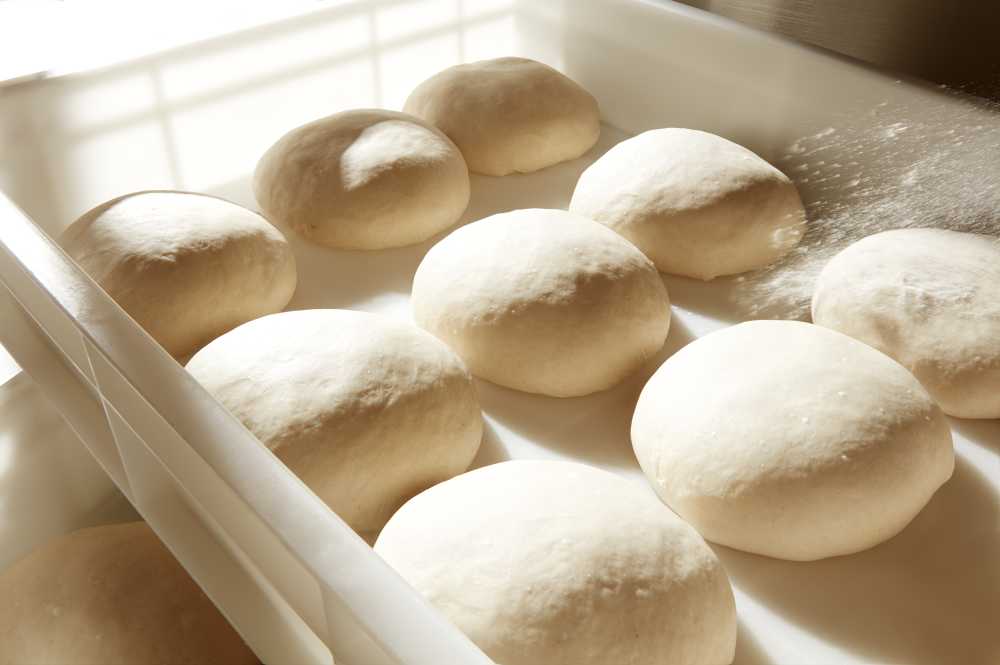
Our method also differs in mixing and fermentation. After testing numerous variations, we found that the best results came from fully developing gluten in the mixing stage, bulk fermenting the dough at room temperature for 20–24 hours, then balling and proofing it for another 3 hours. This method produces a dough with excellent flavor, a balanced hydration level (62.3%), and an open, airy crumb. We also include meat tenderizer as an additional option—this dough relaxer makes the dough easier to shape.

For those looking to experiment further, we also include recipes for a classic AVPN-style dough and a Neapolitan-style dough with a poolish and cold-proofing step. The addition of a pre-ferment like poolish enhances hydration, improves texture, and adds subtle flavor notes, while cold-proofing minimizes overproofing risks.


Getting the Perfect Bake

While “true” Neapolitan pizza is meant to be soft, it should never be soggy or soupy in the center. Even pizzaioli in Naples agree that excessive moisture in the middle is a flaw. Baking at the right temperature is key. If using a traditional wood-fired oven, aim for 840–900°F. For home bakers with conventional ovens, a baking steel or stone can help replicate the intense heat needed for a proper bake.

Mastering Neapolitan pizza at home requires patience and practice, but understanding the science behind the dough brings you one step closer to achieving that perfect crust.

After learning more about Neapolitan pizza, you might be inspired to make your own. Our Neapolitan pizza dough recipe from Modernist Pizza is a great place to start. This recipe includes an optional twist: using a meat tenderizer as a dough relaxer to make the dough more malleable and easier to shape. While optional, we highly recommend giving it a try—it can make the dough-shaping process much simpler. Try it here.

Want to dive deeper into the world of pizza? Check out Modernist Pizza here.


Scoring Bread Dough

When you “score” dough, you’re creating a slit (or slits) in the top of the loaf before baking. Scoring is a crucial step for most doughs because it facilitates the necessary expansion of a loaf. Not all doughs need scoring, and it can sometimes be just for aesthetic purposes depending on the bread type. We prefer scoring breads with high gluten content and a firm texture. Many breads, like sourdough, require a score in order to guide the oven spring and optimize the shape of the baked loaf.

We’ve even experimented with scoring pizza dough. While it’s not something you’d do for your everyday pie, it’s a fun way to borrow bread techniques and see what happens when they’re applied to a pizza rim. Scoring creates small cuts along the edge, much like on a sourdough loaf, and can give the crust a decorative, earlike lift. You can also try an epi cut—snipping the rim with scissors and gently pulling the dough to create a wheat-stalk effect. Though unconventional, these methods add an unexpected, artisan touch to pizza.


Tools for Scoring

You’ll need a tool for scoring, but it doesn’t need to be complicated or expensive. The main consideration is that it must be razor-sharp. Also, thin blades produce cleaner cuts than thick ones. Blades that can be curved will be more versatile than inflexible ones that can’t easily create flaps in the dough.

Our go-to tool is a classic lame (pronounced lahm). Disposable depth-guide lames are a good choice for beginners because they promote even cuts and prevent slicing too deeply. We’ve seen many other tools used too, though each has drawbacks: serrated paring knives, X-ACTO blades, scalpels, even a wooden coffee stirrer joined to a razor blade.

Key Points to Scoring

Use only the tip of your blade to score. Using the whole blade is cumbersome and won’t produce a clean cut—the whole blade is more likely to catch on the dough and rip it. For most dough shapes, cut at a shallow angle (10–25°).

Cut quickly and assertively; do not hesitate. Cutting slowly and tentatively can cause the blade to catch.

Know how deep to go. If you cut too deeply, you risk deflating the dough significantly. Cut too shallow, and the dough may not expand well, which could lead to blowouts. We recommend cuts that are 3–6 mm deep.

Score to the same depth each time. As a loaf of bread bakes, it generates steam that pushes aggressively along the paths of least resistance. Scoring to the same depth helps the loaf expand evenly.

Think about the pattern you want to create. Some loaves will look attractive with symmetrical cuts, but you can create asymmetrical patterns too.

Keep your blades clean. If you bake daily, or even frequently, change your blades every day or two. Be careful—blades are sharp. Crusty blades can be soaked in water to soften the buildup. (Just don’t forget they’re soaking when you reach into the sink or container.) Then wipe them carefully with a clean paper towel.

Keep your lames in a safe place. If you leave blades lying around, the risk of getting cut skyrockets. The prospect of losing a blade in a loaf of bread is even worse.

Modernist Bread at Home offers an assortment of scores that you can try on page 112. 

Evaluating Doneness While Baking

You’ve mixed your dough, let it rise through bulk fermentation, divided and shaped it, proofed it, and scored or otherwise finished it. It’s ready for the oven, where it will transform into bread.


Our Favorite Way To Bake Bread at Home

Home ovens can be finicky. Our favorite way to create steam in a home oven happens to be the simplest: baking the dough in a cast-iron combination cooker (see page 130 of Modernist Bread at Home)—the results are amazing. You can learn more about this technique in our blog.

Evaluating Doneness

Color is one way to check for doneness. We divide loaf color into three categories: blond, brown, and bien cuit (which means “well done” in French). Technically there’s a fourth category: burnt. That’s a category we want to avoid. It may seem simple, but it takes some practice to differentiate them.

Loaves in order of doneness: blond, brown, bien cuit

BLOND

A blond color occurs when the dough’s surface starts to get hot enough to initiate the Maillard reaction. The crust will likely be soft and flabby, even if you have vented the oven, because the dough still contains a lot of water. The crumb is just baked, but there’s a gummy consistency and little to no flavor at this point. If you were parbaking bread (see page 13), this is when you would pull it out of the oven.

BROWN

Let the loaf bake longer, and it will begin to brown. You will notice an amber-brown across the entire surface, with perhaps a few darker traces along the scores and at the narrower edges of a pointy bâtard or short baguette. This is the color that most people believe indicates that a loaf of bread is done. This is also the color that many people prefer. There will be a significant development of flavor, the crust will be crispy/crunchy (for a lean bread), and the crumb will be moist without being gummy. This color produces a rather thin crust.

We like this basic brown for many of our enriched doughs because when they get overly thick, the crust dries out too much. You also run the risk of burning an enriched crust if it bakes too long because of the additional sugars in the dough.

BIEN CUIT

Bien cuit is even darker. The loaf will be very dark brown, just short of being burnt. Most professional bakers think this the ideal color for bread, and some will keep the bien cuit loaves for themselves. The dark bake imparts a slightly bitter tanginess to the crust’s surface, where the surrounding heat deeply affects the sugars and proteins in the dough, transforming them into something completely different. A darker bake goes hand in hand with a thicker crust.

Bien cuit is our preferred bake for many of our breads, including sourdoughs and ryes, but it is not recommended for enriched doughs. To be clear, bien cuit does not mean burnt—and that distinction is not open to interpretation (though it can take some practice to get it right).

You can learn more about doneness on page 142 of Modernist Bread at Home, including some tips on troubleshooting. 

The oven you use plays a major role in how your bread turns out. In fact, one of the biggest differences between home baking and professional baking is the oven itself. That’s why we tested every recipe and technique using our trusty, well-used home oven—and the results were just as delicious. Along the way, we developed simple tricks to help you get the most out of your own oven.


Frankencheese: Our Solution To Making Your Favorite Cheeses Melt Like Pizza Cheese

Cheese comes in many shapes, textures, colors, and flavors. While many cheeses melt exceedingly well and brown slightly as pizza dough bakes, others either do not melt at all or melt with noticeable fat separation. A good melt is achieved with the right combination of moisture content, fat content, and acidity in the cheese. When a cheese lacks this combination, its use for pizza is typically limited to applying after baking, as in goat cheese, blue cheese, and Parmesan. We call these kinds of cheese finishing cheeses.

Our Hypothesis

We wondered if we could manipulate these finishing cheeses using modern techniques and equipment to come up with a protocol for improving their melting qualities. Could we make certain cheeses melt as well as mozzarella? If we could, then we would be able to gain the flexibility of adding these cheeses at any point during baking.

We looked at pairing cheeses that don’t normally melt well with cheeses that do in hope that we could obtain the flavor of the former and the stretch and texture of the latter. We experimented with various cheese blends, and affectionately dubbed them Frankencheeses.

Our first instinct was to start with the one cheese we know melts well on pizza: low-moisture mozzarella (or pizza cheese). Next was to identify the categories of finishing cheeses and a representative cheese from each of these categories. We selected very hard cheeses, blue-veined cheeses, washed-rind cheeses, and acid-coagulated cheeses: specifically Parmesan, blue cheese, Brie, and fresh goat cheese.

Experimentation

Based on the success of the emulsifier technique we used in our Modernist Cheese Sauce recipe (Modernist Pizza vol. 2:255), we had the notion that emulsifiers or emulsifying salts would help mesh the cheeses together. After several trials (and errors) with different cheeses and emulsifiers, we found that some cheeses blended better with 0.5% sodium hexametaphosphate (SHMP), while others blended best with 2% mono-diglyceride flakes (MDG) and the addition of water (Modernist Pizza vol. 2:332).

Along with deciding on an emulsifier, we had to figure out the optimal ratio of pizza cheese to the cheese we wanted to blend. Each cheese-blend scenario was different; the cheeses with mild flavor, such as Brie or Taleggio, required higher amounts cheese in combination with the pizza cheese, while in the case of blue cheese, 20% was sufficient. In the end, we found the flavor of the washed-rind cheeses got lost when combined with the mozzarella.

The Results

For some of the cheeses, we were able to bake them successfully at different temperatures. We could bake the goat cheese–based Frankencheese in both a 454°C / 850°F gas-fired pizza oven and a 315°C / 600°F oven. The advantages are clear (and this can be made with just a few ingredients, plus a Thermomix or immersion blender) and offer a leap forward in the ways we can manipulate various cheeses on pizza so that you can keep the flavor while obtaining the ideal quality of the ever-popular pizza cheese.

If you want to try making your own Frankencheese, you can find our fresh goat cheese, blue cheese, and Parmesan Frankencheese on page 333 of Modernist Pizza vol. 2. These blends store well depending on the recipe, blends can be used for 10 days to 2 weeks when refrigerated.

Learn more about Modernist Pizza.

How To Make Sourdough Starter

Sourdough starter, which we refer to as levain, is made by mixing flour and water, then leaving the mixture to sit, uncovered, at room temperature until the microscopic yeast cells and lactic acid bacteria (LAB) that are present in the flour begin feeding. Within days, you will see signs of fermentation. (You can also start a levain using a premade commercial culture if you want things to move along a little quicker; see page 48 of Modernist Bread at Home for our recommendations.)

In this blog, we’ll cover how to start a levain, what that process looks like, some things to be aware of, and some options for kick-starting your levain. 

THE PROCESS

First, the flour and water mixture goes through an inoculation period, which is when the culture initially takes root and becomes active. This takes 4–5 days for a basic levain and requires regular maintenance by the baker. Yeast and LAB are voracious microbes and will exhaust the food stores in the original flour-and-water mixture if they are not replenished; for your colony to survive and thrive, you need to feed it. To do this, a portion of the levain is removed (and typically discarded, although you can save it for Second Chance Sourdough) and replaced with an equal amount of water and flour (a fresh store of food). The levain is fed on a regular schedule until fermentation has progressed to the point that the levain has sufficient leavening power and has produced enough lactic acid to achieve the degree of acidity that you prefer in your sourdough. At that point, a portion of the levain can be added to your bread dough.

Then you have two options: the first is to continue feeding and using the levain. You can keep that same levain going for months, years, or even decades, so long as you feed it every day at the same time. The other is to freeze the unused levain to use later. We’ll discuss feeding and storing in greater detail in the next lessons.

People often ask us if the pedigree of a sourdough starter is important. Our answer is that a long-lived levain will almost certainly change in composition over time. Think of it like a city; a great city may be just as grand two centuries from now as it is today, but it will have different inhabitants—some descended from the original residents and others who arrived later.

Overall, the pedigree of your levain isn’t crucial. As long as the levain is fed on the same schedule and kept at about the same temperature and level of hydration, it will ripen and mature as expected.

SOME THINGS TO KNOW

  • The environment of a levain is known as a SCOBY (symbiotic culture of bacteria and yeast). Other fermented foods that rely on a type of SCOBY include kombucha and kefir.

  • Before you use your levain’s storage tub or glass jar, wash it out with a mild soap (we suggest hand soap). Do not use sanitizing solutions; they could adversely affect the yeast and LAB.

  • Practically all flours can be used to make a levain. Rye flours have many nutrients that favor yeast development. A new levain made with rye flour will usually be ready to be mixed into dough a few days before a white flour levain is.

  • We do not recommend using high-gluten flours to start a levain.

  • While many bakers swear by using inoculants, such as raisin water, to jump-start their levain, we found that approach was both unnecessary and ineffective. However, we did find some kick-starters that worked: chickpea flour and rye flour. You can learn more about this in Modernist Bread vol. 3:47, 57.

  • Once you’ve started your levain, feed it once a day in cool months/environments and twice a day in hot months/environments.

  • We recommend storing your levain at 21–24 °C / 70–75 °F.

  • If you feed the levain regularly, it will develop more and more lactic and acetic acid flavors over time, which you’ll start to taste in your bread. The souring process levels off after about 10 days.

  • The average inoculation time for a fresh starter made from flour and water is 4–5 days.

Eager to start your own? Take a look at our recipe for liquid sourdough starter/levain. 

Further Reading

  • Second Chance Sourdough recipe
  • Liquid Sourdough Starter recipe
  • How to start a liquid levain—Modernist Bread at Home, p. 51
  • Sweet-and-sour starter recipe—Modernist Bread vol. 3:56
  • Kick-starting your levain—Modernist Bread vol. 3:47, 57
  • Premade commercial culture recommendations—Modernist Bread at Home, p. 48
 

Storage Options for Leftover Sourdough Starter

Without consistent feeding, sourdough starters get tired pretty quickly. We were surprised at how disappointing a sourdough bread made with even a 3-day-old starter (which we refer to as levain) turned out. There was uneven leavening, and while the loaf looked fine on the outside, the inside revealed a tight crumb with a handful of giant air pockets. These aren’t the desirable airy, voluminous holes typical of a ciabatta. Far from it. That’s why we recommend consistent daily feedings to get the most out of your levain.

However, we also understand how this is not always possible, which is why short-term levain storage is still necessary. 

Short-Term Levain Storage (without Feeding) 

Life happens, and being chained to a levain is no way to live. This 2- to 3-day storage method is a short-term solution that will preserve the levain for more than a day and not hinder its leavening power. You may choose to do this if, for example, you’re going away for a long weekend trip, or you own a bakery that’s closed on Monday and Tuesday each week. There are many reasons to step away from a levain for a couple of days. Use the following options to keep your levain alive: add more salt to slow down yeast activity, reduce the water content, or refrigerate it (learn more about these techniques in Modernist Bread vol. 3:61). We also detail how to bring your levain back to normal—that is, back to a schedule of waxing and waning.

USING REFRIGERATION

  1. Refrigerate the levain. The yeast won’t be happy at the standard temperature setting below 4.5 °C / 40 °F, but it won’t die. (Wine refrigerators allow for a warmer range.) 
  2. After 48–72 hours, transfer the levain to a room at 21 °C / 70 °F, allowing the levain to temper and wake up.
  3. Wait at least 12 hours, then feed it.
  4. Wait another 12 hours and feed it again. By the following day, your levain should be back to normal.

What To Do with Extra Levain 

Even with careful planning and levain maintenance, extra levain is typical. Unused portions of levain, such as those removed for a feeding, are often just thrown out. Sometimes a levain is forgotten or ignored for too long and the entire batch loses its leavening power and becomes useless. Over time, the amount of discarded levain can add up.

We’ve developed several techniques to deal with leftover levain, even when it’s inactive.

  • Unused, freshly fed levain can be frozen in single servings and thawed before mixing. You can thaw and use it regularly for up to two weeks. After that, it will lose its leavening power. Learn how we do this in our blog Five Easy Tips for Freezing Your Sourdough Starter.

  • We’ve also developed our Second Chance Sourdough method for levain that has been in the freezer for more than 2 weeks. This method allows you to make a big batch of levain and freeze it in portions for use throughout the year. For the first 2 weeks, thaw and use the portions as you would a regular levain. As storage time goes on, and the thawed levains are visibly less active, simply add 0.5% commercial yeast to boost leavening power.

You’ll be able to make richly flavored sourdough loaves without the hassle and waste that goes along with daily maintenance. You can think of these methods as ways to minimize waste—or as a rather spectacular form of instant sourdough flavoring. 

Other Things to Do with Leftover Levain

What about all that starter discard? There are many uses for the portion that might otherwise end up in the compost. 

  • Make dough, and then freeze it. This offers a convenient way to bake bread whenever you need it. However, the dough may be sluggish and could take longer to ferment, meaning it will have a reduced volume.

  • Try making crackers.

  • Make pancakes from your sourdough starter, which can avoid food waste and makes extra-flavorful pancakes. It can also result in a tougher pancake texture, though.

  • Use inactive levain as a flavoring agent with our Second Chance Levain recipe.

Consistency is key when managing a levain to ensure optimal performance in your sourdough baking. As we’ve explored, even a few days of neglect can alter your levain’s leavening ability, resulting in disappointing loaves with uneven textures and lackluster flavors. That’s why regular feeding schedules are recommended to maintain the vitality of your starter. However, we understand that life’s demands can sometimes interrupt these routines. Our lesson on short-term levain storage offers practical solutions to preserve your levain’s health and revive it if it’s been dormant. By following these methods, you can minimize waste and continue to enjoy delicious sourdough bread.

Further Reading

Time-Saving Tips for Making Bread and Pizza Dough

Cold proof pizza dough
 

Making homemade bread or pizza dough might seem like a daunting task for busy bakers during the workweek, but a few smart strategies can save you time without sacrificing quality. Whether you’re tackling a loaf or prepping for pizza night, here are some practical tips to speed up your bread-making process.

  1. Weigh your ingredients. Using a tared scale is faster and more accurate than filling up measuring cups repeatedly.
  2. Choose a direct dough recipe. Skip the preferment to save time—most direct dough recipes take 4–6 hours, and they don’t compromise on flavor. Our Direct Farmer’s Bread or Direct Focaccia are great alternatives because they skip this preferment step. For pizza, we recommend any of our emergency recipes found in Modernist Pizza, which take 2–3 hours to make from start to finish.
  3. Use warm water. Stick to 24–26°C (75–78°F) water to speed up fermentation without harming the yeast.
  4. For bread, try making pan loaves and boules; they are faster to shape than other shapes. You can decide to divide the dough, shape it, and then put it directly in a baking pan. Most of our recipes will work well as pan loaves.
  5. For pizza dough, use a dough relaxer. Doughs that have such little time to relax after being mixed, divided, and proofed will be difficult to stretch properly. You can also add 0.8–1% instant dry yeast to your recipe and you will have a dough that is ready in 2–3 hours.
  6. Skip folds by mixing fully in a stand mixer. Or opt for rye bread, which doesn’t require full gluten development—just mix it into a smooth paste.
  7. Bulk ferment in a warm place. A cozy spot will accelerate fermentation.
  8. Streamline shaping. Pan loaves and boules are faster to shape, in the case of bread. For even more time saving, skip preshaping and rest by placing the dough directly into pans.
  9. Proof warmly. Like bulk fermentation, a warm proofing environment speeds things along.
  10. Skip scoring. If you proof seam side up, you can bake without scoring the dough.
  11. There aren’t any practical shortcuts for baking or cooling your dough. You want to make sure that the bread has enough time for the crumb structure to fully set and to form the proper crust (although we won’t blame you for tearing into a loaf of warm bread fresh from the oven).

With practice, these tips will help you save time and make homemade bread and pizza an achievable treat, no matter your schedule.

Bread Recipes to Try

Pizza Recipes to Try


Meet Lesley Pettigrew, our Pastry Manager!


As we delve deeper into pastry experiments for our next book, we thought it was time to introduce you to an integral member of our team. Meet Lesley Pettigrew, our Pastry Manager, who joined us last spring.

As we continue our work on the pastry project, Lesley will be overseeing our culinary team. Her role as Pastry Manager is instrumental in bringing Nathan’s vision for pastry experiments to life—guiding recipe development, managing research, and ensuring the highest standards in every pastry we create. An experienced pastry chef and instructor, Lesley brings her passion and expertise to drive the day-to-day operations of the kitchen, from experimentation to execution. She plays a vital role in pushing the boundaries of pastry innovation, constantly refining techniques and exploring new ideas. Over the past few months, we’ve explored everything from meringues and cakes to macarons and frostings—and there’s still so much more to discover!

One of the things we value about Lesley is her innovative approach to baking, especially her creative use of unique fruits and vegetables. She has a particular fondness for quince, medlar, and citrus fruits like yuzu. Lesley has an insatiable curiosity for pastry and is passionate about pushing the boundaries of what’s possible in this space. We can’t wait to see (and taste!) what she creates next.

Though she grew up in Seattle, Lesley has also lived in Denmark, Japan, and San Diego. When she’s not in the kitchen, she enjoys gardening, hiking, snowshoeing, and spending time with her family.

We are beyond excited to have Lesley on board as we continue the pastry research for our next book.

Stay tuned for more updates—we are excited for what is to come!


All About Pressure-Caramelized Soups


Pressure caramelization unlocks incredible flavors with just a few simple ingredients. Take our Pressure-Caramelized Carrot Soup, for example. When you combine carrots, butter, a pinch of salt, and baking soda in a pressure cooker, magic happens. The result is a combination of caramelization and the Maillard reaction (what people commonly call “browning”), which produces a rich, caramelized, nutty flavor. Pressure cookers are particularly suited for promoting the Maillard reaction because elevated temperatures encourage foods to develop their characteristic flavors far more quickly than conventional cooking methods (such as roasting) do, thereby transforming a long process into a short 20-minute cook time. Adding 0.5% baking soda when pressure-cooking further speeds flavor reactions by producing an alkaline pH of about 7.5.

By using this technique, the carrot flavor is further heightened because no heavy cream is needed. It’s just carrots, carrot juice, and butter. It is so delicious that you can only taste two things: the pure intense essence of the carrots and a warm undertone of caramel flavor.

Carrot soup is just the beginning. Using this technique, you can create variations with a wide range of vegetables and fruits. Under pressure, ingredients transform into something dramatically new yet strikingly familiar. Sweet corn becomes a creamy soup with popcorn-like notes, bananas turn into a dessert-like puree reminiscent of baked banana bread, and sweet potatoes intensify into a flavor powerhouse. Below, you can see the many variations that we made in Modernist Cuisine at Home.


If you’re looking for a way to tempt even the pickiest eaters into loving vegetables, this might be it. Simply swap the carrots in our recipe with another ingredient, adjust the liquid (e.g., corn juice, banana puree, or sweet potato water), and follow the same steps. For a thick puree, skip the final thinning steps and serve it as a decadent side dish.

Pro tip: While these recipes scale up beautifully, avoid scaling down too much, as the vegetables’ internal moisture is critical for creating steam.

The Science Behind the Technique

Vegetables have strong cell walls that soften under high heat, but they rarely exceed the boiling point of water in traditional cooking methods. Enter the pressure cooker, where elevated pressure raises the boiling point, allowing vegetables to cook quickly and evenly without drying out. The result? Juices stay concentrated, flavors intensify, and textures become luxuriously tender—perfect for soups and purees.

We exploit a similar technique to re-create a classic vegetable stew. Pressure-cooked barley is quick to make and perfectly toothsome. The pressure extracts juices undiluted from sweet onions, leeks, and garlic to yield an intense broth. And all the season’s best vegetables take on the texture of fudge in a matter of minutes.

You can use whichever vegetables and greens are currently at their peak. This pressure-caramelizing technique is versatile enough to accommodate a wide range of flavors.

Whether you’re savoring caramelized carrot soup, velvety sweet potato puree, or popcorn-flavored sweet corn soup, pressure cooking takes winter vegetables to the next level. Pressure-cooking isn’t just about speed—it’s about discovery. Try swapping carrots for your favorite seasonal vegetables, like parsnips, leeks, or squash, and let your pressure cooker do the rest. Before you know it, you’ll have a repertoire of unique hearty soups to make all year long.

Sign up for our monthly newsletter to learn more cooking tips.


All About Whipping Siphons


Whipping siphons have revolutionized the art of foam-making, bringing efficiency and creativity to kitchens everywhere. But siphons are useful for making so much more than whipped cream. These tools allow chefs to transform fatty or starchy ingredients—even fluid gels—into delicate, stable foams with ease. We use ours all the time—for making fresh soda, greatly speeding up marinating, infusing fruit with a flavorful juice, or topping a dish with foam for flavor and textural contrast.

Whipping siphons require cartridges of gas to function. Nitrous oxide offers exceptional solubility in fats and oils without the risk of oxidation or bacterial growth. Each standard charger contains 8 g of this versatile gas, which dissolves into the liquid, pressurizing the siphon. When released, the mixture expands, creating the airy, smooth texture that defines culinary foams. Carbon dioxide is also another type of gas that can be used with a whipping siphon, but its high solubility and distinct fizzy taste often make it less ideal for creating creamy, stable foams. With nitrous oxide, however, chefs gain a reliable, flavor-neutral tool for culinary experimentation, whether crafting decadent dessert sauces or innovative savory toppings. This is why we often prefer using nitrous oxide; however, carbon dioxide is required if your goal is to carbonate rather than to foam.

The possibilities with a whipping siphon are virtually limitless, opening up a world of culinary creativity. Take, for instance, our Caramelized Carrot Pizza from Modernist Pizza (page 277), which features a coconut chutney foam. This foam—made with cilantro, mint, green chili pepper, coconut cream, and coconut milk—adds a vibrant, aromatic layer to the dish.

The siphon can also streamline the preparation of batters, like teff injera (Modernist Bread, Vol. 5:156) or tempura batter (Modernist Pizza, Vol. 3:281), creating light, consistent textures with ease.

Additionally, it’s a game changer for emulsion-based sauces, particularly during service. The siphon not only keeps sauces warm but also aerates them, creating volume and a lighter mouthfeel compared to dense, overly rich sauces. For example, we use it to prepare Sous Vide Hollandaise or sabayon sauce.


Tips for Using a Siphon

Whether you’re carbonating, infusing, or foaming, there are a few basics you should know. First off, the siphon requires cartridges of gas, also called chargers, to pressurize the chamber holding the liquid. Carbon dioxide is best used for carbonation only. We use nitrous oxide for foams, marinating, and infusing. A cartridge holds 8 g of gas, can be used only once, and costs about 50 cents. Two cartridges are typically sufficient to charge a 1 L siphon. Use about 2% gas, or 8 g of gas for every 400 g of liquid—more if the liquid is low in fat.

Listen to your siphon. If the seal on your whipping siphon is faulty, the gas will go in and right back out again. So listen closely as you charge it. You should hear gas filling the chamber—and then silence. Still hear hissing? Remnants of a previous foam might be causing a leak, or some part of the siphon could be damaged. Vent the siphon, remove the nozzle, unscrew the top, and take out the cartridge. Then clean these parts and the rubber gaskets thoroughly, and check to make sure that they are undamaged and in place.

The rubber gasket keeps the dissolved gas from escaping from the lid. Make sure it fits snugly along the top of the lid and is intact.

A disposable cartridge holds 8 g of nitrous oxide, the gas used to pressurize the siphon. The number of cartridges you need depends on the volume of the siphon, how full the siphon is, the fat content of the liquid to be whipped, and the temperature of that liquid. Generally, two cartridges are enough for a 1 L siphon.

Charging the siphon—inserting the gas cartridge so that it is pierced by the pin—increases the pressure inside it dramatically and forces the nitrous oxide to dissolve into the liquid. Shaking the container is crucial to ensure that the gas is evenly distributed.


Carbonating with a siphon

Create a sparkling drink or give porous food a surprising fizz with your whipping siphon. We slice carbonated grapes over chilled oysters and pair rich pâtés with sweet, tart, fizzy raisins. You need three cartridges of carbon dioxide to get really good carbonation in a 1 L whipping siphon or soda siphon.

STEPS TO CARBONATING WITH A SIPHON

  1. Chill both the liquid and the siphon. Carbon dioxide is most soluble in cold liquids.
  2. Pour in a cold liquid or add a chilled fruit. Do not overfill. Tighten the lid.
  3. Insert the first carbon dioxide cartridge while holding the siphon upright. Hold down the nozzle to blow out the gas. The venting step is important because it replaces the air sitting above the liquid with carbon dioxide.
  4. Insert one or two more cartridges of carbon dioxide; do not dispense any of the gas. Shake the siphon vigorously for 5–10 seconds.
  5. Refrigerate the siphon to allow the gas to fully dissolve into the liquid. Let liquids sit for 2–4 hours. Let fruit sit for at least 4 hours, but preferably for 8–10 hours. Don’t open the siphon until you serve the fruit.
  6. Open the siphon by holding it upright, pressing a cloth against the nozzle to contain any liquid, and slowly releasing the gas. Then remove the siphon lid, and pour out the soda or fruit. Dispensing soda through the nozzle results in a tingly and foamy drink, not a fizzy one, because the gas exits the liquid too quickly.

If you are ready to experiment, give carbonated cranberries a try.

Foaming with a siphon


Whipping siphons were designed for aerating cream that is high in fat. (Nitrous oxide dissolves much better in fat than in water.) But you can foam any liquid thick enough to hold bubbles. Add starch, gelatin, eggs, or agar to thin liquids to give them enough body for foaming. A fine, creamy foam comforts and provides contrasting texture, like mashed potatoes, or whipped cream atop a dense dessert. Light, acidic, and airy foams can contribute an additional layer of flavor. The more air in the foam, the less concentrated its flavor, so use a very strong liquid when making a foam to serve as a garnish or sauce. A foam used to top some other flavorful food may not need to be as intense. It’s a matter of finding the right balance.

STEPS TO FOAMING WITH A SIPHON

  1. Add the liquid to the siphon, and tighten the lid. Do not overfill it.
  2. Charge the siphon with only one cartridge of nitrous oxide. Shake vigorously for 5–10 seconds. Resting is unnecessary; the gas dissolves quickly.
  3. Turn the siphon upside down, and press the lever to dispense a bit of foam. Check the texture. One cartridge is usually sufficient for high-fat liquids. Add more cartridges to create progressively thicker foams. The foam will release any gas it can’t hold, so an extra charge won’t ruin it. Shake the siphon each time before you dispense the foam.

Pressure-infusing and pressure-marinating with a siphon

You can use the high gas pressure in a siphon to force liquid into a solid, thus speeding up the processes of infusing, brining, or marinating. Meat cut into cubes for kebabs, for example, takes 20 minutes to marinate instead of 1–12 hours. Infusing porous fruit with liquid is a fun twist—think strawberries and lemonade, apple slices bursting with apple juice, or watermelon with hints of green tea.

STEPS TO INFUSING AND MARINATING WITH A SIPHON

  1. Add cubes of meat to the siphon, and cover them with marinade or brine. To infuse fruit with a liquid, add the fruit and enough liquid to cover it. Tighten the lid.
  2. Charge the siphon with nitrous oxide. Use two cartridges in a 1 L siphon. Shake vigorously for 5–10 seconds.
  3. Refrigerate the siphon for 20 minutes to let the flavors infuse.
  4. Open the siphon by holding it upright, pressing a cloth against the nozzle to contain any liquid, and slowly releasing the gas. Then unscrew the siphon lid, and pour out the contents.

Further Reading